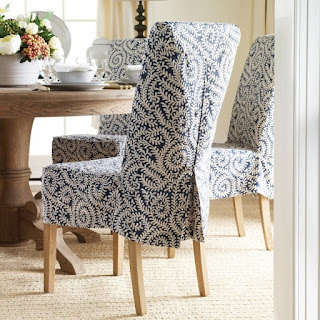
How to Make Dining Chair Covers?
A dining table may be the center of your dining space but it is not complete without the chairs. Chairs are what add character to your dining table. The thing about human nature is, we get bored quite easily. This is where we can use seat covers for a change once in a while.
Looking for the right size and style of cover for your Dining Chair can be
challenging especially if you don’t know which color will suit the interior
aesthetics as well. the solution here is to make your seat covers yourself and
in the comfort of your home. This way you can easily go and choose the fabric,
color, and pattern you want and can stitch it yourself.
Below are fun and easy steps you can follow to make covers for all types of chairs be it a leather dining chair or armchair dining chair.
m Measure your
dining chairs
Measure the seats to access how much fabric you will be needed, it
is safe to buy some extra as well especially when the fabric you plan on buying
has a pattern that continues. For such a case you will have to buy extra as you
might need to move the pattern around to make it fit the chair.
Measure the width of the backrest as well as the seat, the length should be how long you want the cover to be. Start by measuring from the back of the backrest all the way to the front and then measure the sides, and estimate how much fabric will be needed.
2.
Choose a fabric
and color for the chair cover
When it’s time to select the fabric, make sure to coordinate it
with the rest of your interior furniture. Remember the seats will be going with
the dining table so they should match it as well as make the table look sharp
and visually appealing.
Make sure the fabric you choose is also sustainable with your household. If you have kids or pets at home then make sure to use darker colors and avoid using lighter colors that will take forever to remove stains from.
3.
Draw a pattern
on the fabric selected for the seat cover
This is the way to get measurements into the fabric, mark however you want the style to be on the backside of the cover with a chalk or pencil. Leave some inches from the bottom to hem the folds inward.
4.
Cutting the
fabric according to your measurements and style
Leave an inch for the seams and start cutting the fabric, cutting the fabric into pieces is the easy part.
5.
Pin the pattern
The tricky part is to pin the pieces of fabric together, use
straight pins and pin them on the upside-down side of the cover that you will
need to place on the seat.
After the pieces are pinned together it's time to take the cover off and move to stitch it.
6.
Adjust and sew
Adjust the style and start sewing it accordingly, you can choose to leave a slit on the backside of the chair for easy slip-on. Remember to turn the inch edges you left to secure the seams.
The covers are ready to be slipped on your leather or Fabric Dining Chairs.
They can also act as an extra exterior to protect your seat’s fabric. After you
put the covers on the chairs, they will look brand new. That is the fun part of
making extra covers, each time with a new cover it looks like you changed the
whole look of your space. You can even try making multi-color covers to make
the dining space pop out.


Comments
Post a Comment